How to enable Google Cloud Vision?
Here we show how to enable Google Cloud Vision.
1.) Go to Google Console and select you project: https://console.cloud.google.com/apis/library
2.) In section "API Library" enter to search field "cloud vision api" and press Enter
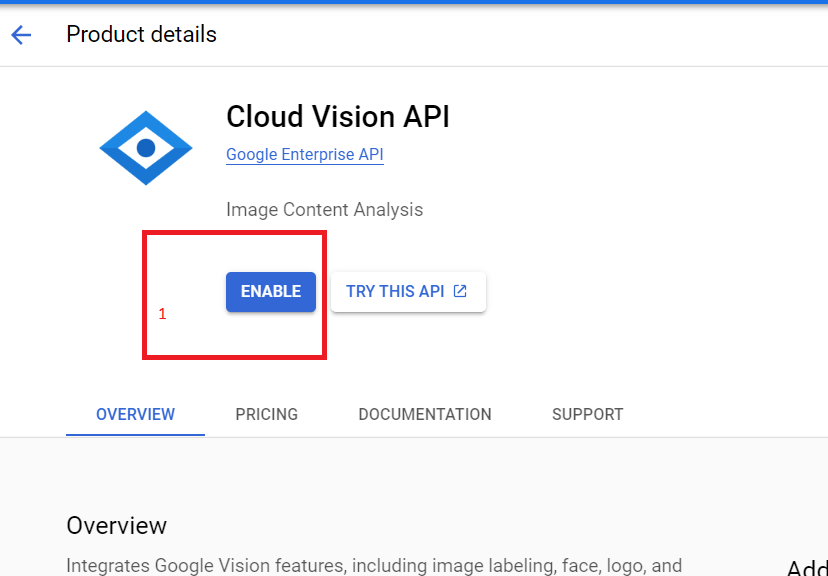
3.) On the results page select "Cloud vision Api"
4.) Click "ENABLE" button
5.) Go to step 6 if earlier you not configured OTP and you not have uploaded Service Account json file on you server: https://raccoonsquare.com/help/how_to_add_firebase_otp_support/
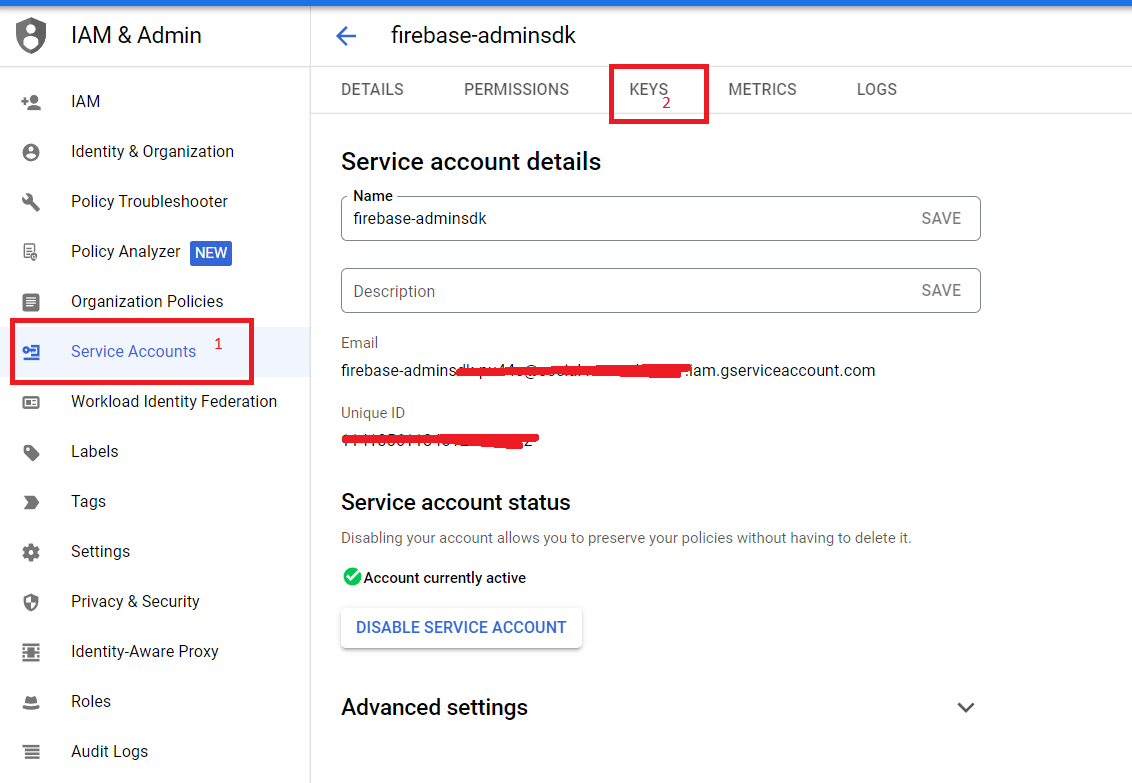
6.) Go to Credentials section: https://console.cloud.google.com/apis/credentials and select you Service Account, then click "KEYS" tab (2)
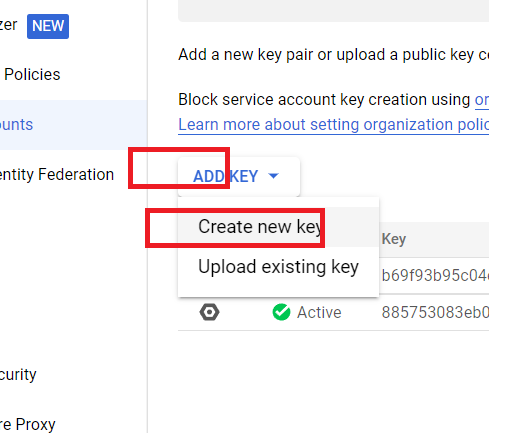
7.) Click "ADD KEY" and "Create new key"
8.) Select "key type" JSON and click "CREATE" button
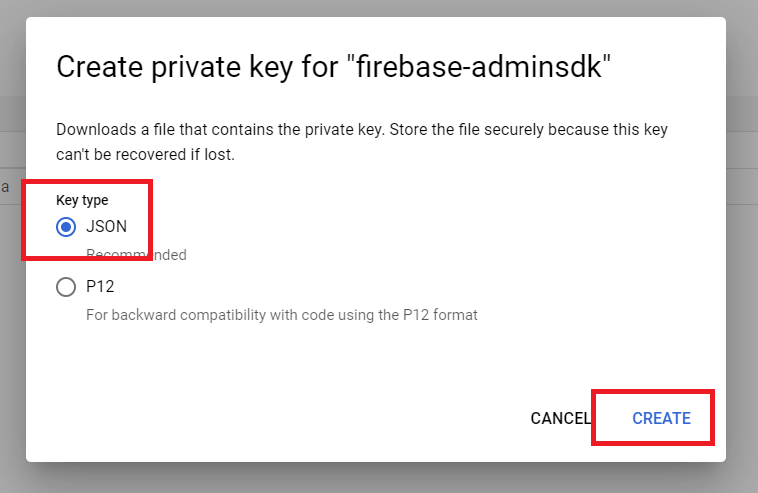
9.) You will receive a message "Private key saved to your computer" and the file will be saved on your computer
10.) Downloaded json file copy to you server side folder: "js/firebase/" (Dating App) or "public/js/firebase/" (My Social Network)
11. Finish ;)